![[Laravel] Naver 스마트에디터를 Laravel에 적용하기](/title-images/166.jpg)
[Laravel] Naver 스마트에디터를 Laravel에 적용하기
Naver 스마트에디터를 Laravel에 적용하기
이번 장에서는 Naver에서 제공하는 Smart-Editor를 이용하여 파일 첨부 기능 을 추가한 후 Laravel에 적용하는 것에 대한 설명을 드리도록 하겠습니다.
스마트에디터 다운로드
1) 다운로드
git clone https://github.com/naver/smarteditor2.git
cd smarteditor2 && npm install
2) start
npm start
위의 그림과 같이 보안상 기본적인 스마트 에디터에는 파일을 올리는 기능이 존재 하지 않습니다.(첨부파일은 서버 보안상 민감한 사항)
기본 구조 설명
수정을 위해서는 현재 구조를 알아야 하는데 필요한 파일만 간략하게 설명 드리도록 하겠습니다.
- smartdeitor2
  - workspace
    - static
      - css
        - ko_KR
          - smart_editor2.css
      - js
        - lib
          - jindo_component.js
          - jindo2.all.js
        - service
          - HuskyEZCreator.js
          - SE2BasicCreator.js
          - SE2M_Configuration.js
      - SmartEditor2.html
      - SmartEditor2Skin.html
초기 파일은 SmartEditor2.html 을 불러들이지만 이곳에서는 다시 SmartEditor2Skin.html 을 불러들입니다.
laravel과 연동
1. smarteditor2.js 파일
다운로드된 파일의 webpack.config.js를 살펴보면 'smarteditor2': './workspace/src/bundle/index.js' 이 있다. 이렇게 정의된 파일 smarteditor2.js를 다운 받아야 한다. npm start 후 url 입력창에 localhost:8080/js/smarteditor2.js 를 입력한 후 smarteditor2.js 파일을 다운받아 두자
2. 관련 리소스 업로드
public/plugins/editor/smart-editor/ 폴더를 만들고 관련 리소스 파일들을 업로드 한다.
모양은 대강 아래와 같다. 중요한 것은 smarteditor2.js 는 직접 데모사이트에서 다운받아야 한다는 것이다.
- public
  - plugins
    - editor
      - smart-editor
        - css
          - ko_KR
            - smart_editor2.css
        - js
          - smarteditor2.js // 이것은 수동으로 다운받아야 한다.
          - lib
            - jindo_component.js
            - jindo2.all.js
          - service
            - HuskyEZCreator.js
            - SE2BasicCreator.js
            - SE2M_Configuration.js
3. editor 불러오기
3-1. route(web.php)
Route::get('smart-editor', array('uses'=>'SmartEditorController@main'))->name('smarteditor');
3-2. Controller (SmartEditorController.php)
<?php
namespace App\Http\Controllers;

use App\Http\Controllers\Controller;

class SmartEditorController extends Controller
{
    public function main()
    {
      return view('smart-editor.create');
    }
}
3-3 blade
file : /view/smart-editor/create.blade.php
..........
<textarea name="ir1" id="ir1"></textarea>


@section('scripts')
@parent
<script src="/plugins/editor/smart-editor/js/service/HuskyEZCreator.js"></script>
<script>
  var oEditors = [];
  nhn.husky.EZCreator.createInIFrame({
    oAppRef: oEditors,
    elPlaceHolder: "ir1",
    sSkinURI: "/plugins/editor/smart-editor/SmartEditor2Skin.html",
    fCreator: "createSEditor2"
  });
</script>
@endsection
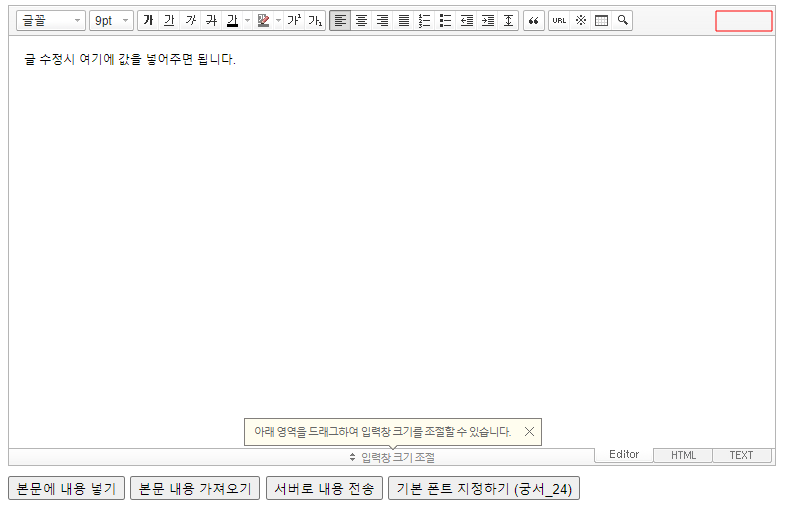
세팅을 완료후 https:://domain/smarteditor을 typing 하면 editor 창이 생성되는 것을 확인 할 수 있습니다.
쓰기와 수정하기
간단히 생성된 편집창을 이용해서 쓰기 및 수정을 구현하도록 하겠습니다.
web.php
Route::get('/smarteditor', array('uses'=>'SmartEditorController@main'))->name('smarteditor');
Route::post('/smarteditor', array('uses'=>'SmartEditorController@store'));
SmartEditorController.php
public function main()
{
  $data = new \stdclass;
  $data->ir1 = '<p>서버의 데이타는 이렇게 호출됩니다';
  return view('smart-editor.create', ['data' => $data]);
}

public function store(Request $request)
{
  // 데이타 처리
}
create.blade.php
..........
{{ Form::open(['route'=>['smarteditor'], 'method'=>'POST', 'enctype'=>'multipart/form-data', 'class'=>'']) }}
<textarea name="ir1" id="ir1" style="width: 100%;">{{$data->ir1}}</textarea>
<input type="button" onclick="submitContents(this);" value="서버로 내용 전송" />
{{ Form::close() }}
..........
<script>
..........
  function submitContents(elClickedObj) {
    oEditors.getById["ir1"].exec("UPDATE_CONTENTS_FIELD", []);	// 에디터의 내용이 textarea에 적용됩니다.
    // 에디터의 내용에 대한 값 검증은 이곳에서 document.getElementById("ir1").value를 이용해서 처리하면 됩니다.
    try {
      elClickedObj.form.submit();
    } catch(e) {}
  }
</script>
..........
사진 플러그인 추가
editor 창에 사진을 업로드할 수 있는 plugin을 추가하도록 하겠습니다.
현재는 공식문서상의 /quick_photo_uploader 를 보안 이슈로 인해 제공하지 않으므로 예전버전에서 찾아 수정을 해야 합니다.
1. photo_uploader 추가
위의 파일을 푸시면 /sample/photo_uploader 파일이 나오는데 이 것을 업로드합니다.
- smart-editor
  - css
  - img
  - js
  - photo_uploader <-- 이곳으로 업로드
1-1. hp_SE2M_AttachQuickPhoto.js 추가
hp_SE2M_AttachQuickPhoto.js 다운로드
다운받은 hp_SE2M_AttachQuickPhoto.js를 업로드 합니다.
..........
- smart-editor
  - photo_uploader
    - js
      - hp_SE2M_AttachQuickPhoto.js
1-2. 업로드 팝업창 url
hp_SE2M_AttachQuickPhoto.js 을 열어 업로드 팝업창 호출 url을 변경합니다.
..........
makePopupURL : function(){
  var sPopupUrl = "/smart-editor/photo-upload";
  return sPopupUrl;
},
..........
1-3. hp_SE2M_AttachQuickPhoto.js 삽입
SmartEditor2Skin.html 을 연후 hp_SE2M_AttachQuickPhoto.js 호출 스크립트를 추가 합니다.
<!-- 사진 첨부관련 js -->
<script type="text/javascript" src="./photo_uploader/js/hp_SE2M_AttachQuickPhoto.js" charset="utf-8"></script>
1-4
web.php(route)
var sPopupUrl = "/smart-editor/photo-upload"; 에서 정의된 파업업로드창 구현
Route::get('smart-editor/photo-upload', array('uses'=>'SmartEditorController@upload'))->name('smarteditor.photo'); // 업로드창
Route::post('smart-editor/photo-upload', array('uses'=>'SmartEditorController@uploadStore')); // 일반적인 업로드시
Route::post('smart-editor/photo-upload/html5', array('uses'=>'SmartEditorController@uploadStoreHtml5')); // html5를 이용한 업로드시
SmartEditorController > upload
public function upload()
{
  return view('smart-editor.photo-upload', []);
}
photo-upload.blade.php
다운받은 photo_uploader 폴더에서 photo_uploader.html 파일을 수정하여 blade 파일로 만든다.
..........
<div id="pop_wrap">
<!-- 원본에서와 동일하게 id="pop_wrap" 부분을 그대로 copy 한다 -->
..........
<!-- content -->
<!-- <form id="editor_upimage"> 부분을 아래와 같이 변경한다. -->
<form id="editor_upimage" name="editor_upimage" action="/smarteditor/photo-upload" method="post" enctype="multipart/form-data" onSubmit="return false;">
      {!! csrf_field() !!}
  <div id="pop_content2">
<input type="file" class="upload" id="uploadInputBox" name="Filedata">
      <p class="dsc" id="info"><strong>10MB</strong>이하의 이미지 파일만 등록할 수 있습니다.<br>(JPG, GIF, PNG, BMP)</p>
  </div>
</form>
<!-- //content -->

..........
</div>
<!-- /banner-feature -->
@endsection

@section('styles')
@parent
<style type="text/css">
<!-- 원본에서와 동일하게 style 부분을 그대로 copy 한다 -->
</style>
@endsection
@section('scripts')
@parent
<script src="/plugins/editor/smart-editor/photo_uploader/jindo.min.js"></script>
<script src="/plugins/editor/smart-editor/photo_uploader/jindo.fileuploader.js"></script>
<script src="/plugins/editor/smart-editor/photo_uploader/attach_photo.js"></script>
@endsection
2. 편집창에 사진첨부 아이콘 출력하기
smart-editor/SmartEditor2Skin.html 약 530째 줄에 아래와 같이 추가합니다.
..........
        </div>
          <!-- //찾기/바꾸기 -->
          <!--//@lazyload_html-->
      </li>
    </ul>
    // 업로드 관련 추가 되는 부분 시작
    <ul class="se2_multy">
      <li class="se2_mn husky_seditor_ui_photo_attach"><button type="button" class="se2_photo ico_btn"><span class="se2_icon"></span><span class="se2_mntxt">사진<span class="se2_new"></span></span></button></li>
    </ul>
    // 업로드 관련 추가 되는 부분 끝
  </div>
  <!-- //704이상 -->
</div>
..........
상기와 같이 하면 editor 창의 상단메뉴 우측에 사진 이미지가 디스플레이 되며 클릭시 /smart-editor/photo-upload 창이 열리는 것을 확인하실 수 있습니다.
3. 파일업로드 처리하기
/smart-editor/photo_uploader/attach_photo.js 수정
..........
function html5Upload() {
  ..........
  sUploadURL= '/smart-editor/photo-upload/html5'; 	//upload URL
  ..........
}
..........
function callAjaxForHTML5 (tempFile, sUploadURL){
  ..........
  oAjax.header("contentType","multipart/form-data");
  var csrfToken = document.getElementsByName('csrf-token'); // 추가
  oAjax.header("X-CSRF-TOKEN",csrfToken[0].content); // 추가
  oAjax.header("file-name",encodeURIComponent(tempFile.name));
  ..........
}
..........
SmartEditorController.php에서 일반 업로드 처리 및 html5에 관한 처리 부분 추가
/**
* 일반 업로드 처리
*/
public function uploadStore(Request $request) {
    $url = $request->get('callback').'?callback_func='.$request->get('callback_func');

    if ($request->hasFile('Filedata')) {
      $validator = Validator::make($request->all(), [
        'Filedata' => 'image',
      ]);

      // if it is not image file type
      if ($validator->fails()) {
        $url .= '&errstr=not_image_file';
        return redirect($url);
      }

      $file = $request->file('Filedata');
      $filepath = 'public/tmp/editor/'.session()->getId();

      $filename = $file->getClientOriginalName();
      $path = Storage::put($filepath, $file);

      $url .= '&bNewLine=true';
      $url .= '&sFilename='.basename($path);;
      $url .= '&sFileURL='.Storage::url($path);
    } else {
      $url .= '&errstr=not_exist_file';
    }
    return  $url;
  }

  /**
  * HTML5 일경우(ajax로 전송시)
  */
  public function uploadStoreHtml5(Request $request) {
    $filename = $request->header('file-name');
    Log::info($filename);
    $content = $request->getContent();

    $url = '';

    $file = new \stdClass;
    $file->name = $filename;
    $file->content = $request->getContent();

    $filepath = 'public/tmp/editor/'.session()->getId();

    Storage::disk('local')->put($filepath."/".$file->name, $file->content);
      $url .= '&bNewLine=true';
      $url .= '&sFilename='.$file->name;
      $url .= '&sFileURL='.Storage::url($filepath).'/'.$file->name;

    return $url;
  }